
By Melissa Kruse-Peeples, NS/S Conservation Program Manager.
Amaranth is a wonderful, although often underutilized, grain crop. Actually, it is one of the Americas oldest grain crops with archaeological evidence for its use going back at least 8,000 years. Naturally gluten-free, protein rich amaranth grain is a nutritional powerhouse.
The small nutty grain can be toasted and popped, ground into flour, or eaten whole. Amaranth greens, or quelites, are also edible and nutritional powerhouses themselves.
Amaranth is easy to grow and Native Seeds/SEARCH offers over a dozen varieties of amaranth. Great grain producing varieties include Guarijio Grain, Alegria, Mexican Grain, and New Mexico. Plant with the spring or summer rains by broadcasting or raking the tiny seeds, covering with 1/4 inch of soil. Thin any crowded seedlings and add them to a salad. Amaranth species are wind pollinated and easily cross so bag the flowers when they emerge to maintain purity. Bagging the maturing seedheads also makes harvesting the grain easier. Shake dry, mature seedheads inside a paper bag to release the grain. Using the wind, repeatedly winnow the flower bracts from the grain.
The grain is a great addition to baked goods and once toasted, it makes a great pinole (a nourishing drink thickened with flour). Ground amaranth flour can also be used to make tamales and tortillas.
Amaranth "Cream of Wheat"
Bring 1 cup grain and 2 ½ cups water to a boil and simmer for 20 minutes until water is absorbed. Add fruit, honey, cinnamon, or coconut milk to sweeten. Native Seeds/SEARCH offers bags of organic grain amaranth retail shop in Tucson.
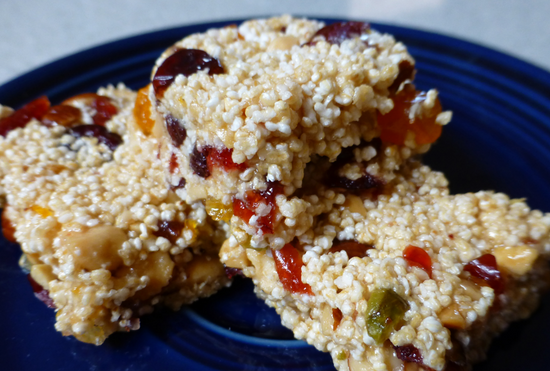
Below is a recipe for Fruit and Nut Alegria Bars. Alegría candy, made with popped or puffed amaranth grain and honey, is common throughout Mexico and can sometimes be found in local Mexican markets in the United States. This confection has ancient Aztec origins and was once widely consumed as part of religious ceremonies and social gatherings. Unfortunately, amaranth was once forbidden by Spanish colonizers in the 1500s because of the religious association but fortunately amaranth is experiencing a resurgence in use. Alegria is the Spanish word for happiness and once you taste these bars, you will understand why.
Fruit and Nut Alegría Bars
4 cups popped amaranth (or about 1-2 cups amaranth grain)
6 Tablespoons honey
6 Tablespoons agave nectar
6 Tablespoons butter
1/2 cup chopped nuts (almonds, pistachio, peanuts) or seeds (chia, pumpkin, sunflower)
1 cup finely diced dried fruit (apricots, cranberries, cherries, figs, apples, etc.)
Directions:
- If you are using amaranth grain that has not been popped heat up a skillet to high heat. The pan should be deep, or you will have popped amaranth all over your kitchen. The grain is light and will fly up into the air. No oil is necessary. Slowly add 1 tablespoon to test the pan and agitate the pan or stir with a wooden spoon. The grain should pop within 15 seconds. Transfer to a bowl quickly as the amaranth can easily burn. If popping does not occur the pan is not hot enough. Continue popping in small batches.
- Generously coat a 8 x 8 inch pan with nonstick spray.
- Combine honey, nectar and butter in a saucepan and cook over medium heat. Boil for 7 minutes, stirring constantly. The syrup will bubble and start to caramelize. The length of time is very important to allow the bars to stick together, but not turn into a hard candy that will break your teeth.
- After 7 minutes of boiling, slowly add the popped amaranth (reserve ca. 1/2 cup), seeds, nuts, and diced dried fruit. Use what combinations taste good to you, but keep the proportions the same. I like cranberries, apricots, and almonds. Stir with a wooden spoon until all ingredients are coated with the syrup. If the mixture seems too wet, add a few more tablespoons of popped amaranth. You want all the ingredients to be coated so it sticks together.
- Transfer the mixture to the coated pan and push the mixture into the corners of the pan by hand or the back of a spoon. Let cool and harden. Cut into bars and enjoy!