
By Laura Neff, NS/S Education Assistant.
At Native Seeds/SEARCH, we want to ensure that all seeds in our seed bank and those distributed to growers like you, are healthy and viable. One way we do this is through germination testing. In fact, germination testing is required by federal and state law to ensure that seeds sold meet minimum germination standards.
As a home gardener and seed saver, you can use the same principles of germination testing to make sure your seeds are going to sprout when planted. You may have some packets of seeds that are a few years old, or recently saved some seeds and are curious if they are viable. Seeds are living things and their viability is based on their age, initial quality, species, and storage conditions. One of the easiest ways to determine viability before you plant is to perform an at-home germination test. Here is what you will need to get started:
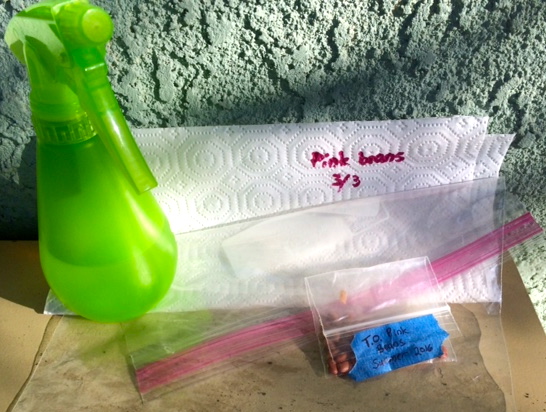
- spray bottle
- water (preferably distilled)
- a small sample of seeds
- plastic bags, ziplock bags
- paper towels
- marker
- nail file, sandpaper, or fingernail clippers if seeds require scarification
Preparing Your Germination Test
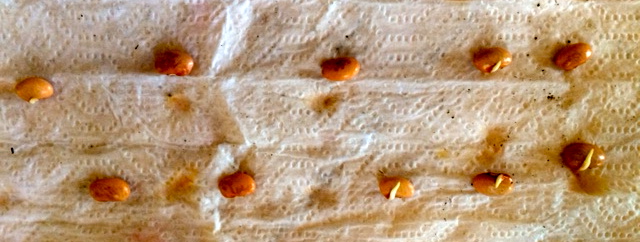
Set aside a small amount of seeds to test. If available, testing 10 seeds simplifies the calculations that are done after the testing. Keep in mind, the more seeds you test, the more accurate the germination rate will be. Harder seeds, like devil's claw or okra, may need to be scarified. To do this, use a sheet of fine-grained sand paper and rub it across the surface of the seed or use a nail clipper to nick the seed coat. Layer two paper towels and label them with the variety you are testing and the start date. It is also useful to write down the number of seeds started in the test. As they germinate, they will detach from the seed coat and become intertwined, making it difficult to determine what you started with. Moisten (but don’t soak) the paper towels with distilled or clean tap water. Too much moisture will promote bacterial and fungal growth.

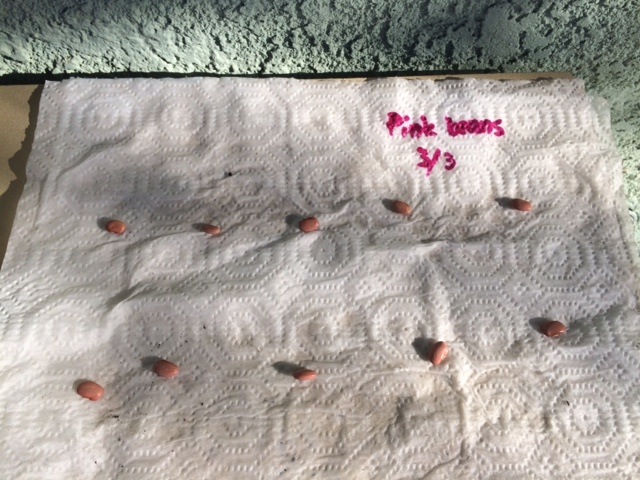
Test performed using Tohono O'odham Pink Beans from 2016
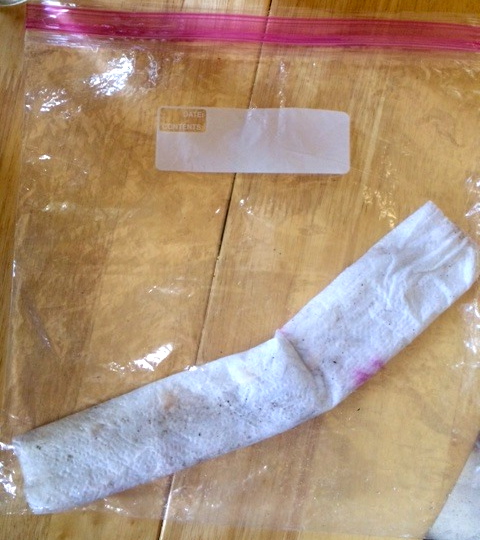
Place the seeds on half of the moistened paper towel, leaving 1-1.5" of space between the seeds and the edge of the paper towel. Fold the other half of the paper towel on top of the seeds. Roll up the paper towel and place in a plastic or Ziploc bag. Do not seal completely as seeds also need air for healthy germination. Where the seeds should be left depends on the type of seed it is. Planting instructions will give you insight. Many folks have suggested putting the seeds on top of the refrigerator for heat. Do not place in direct sunlight.
Evaluation
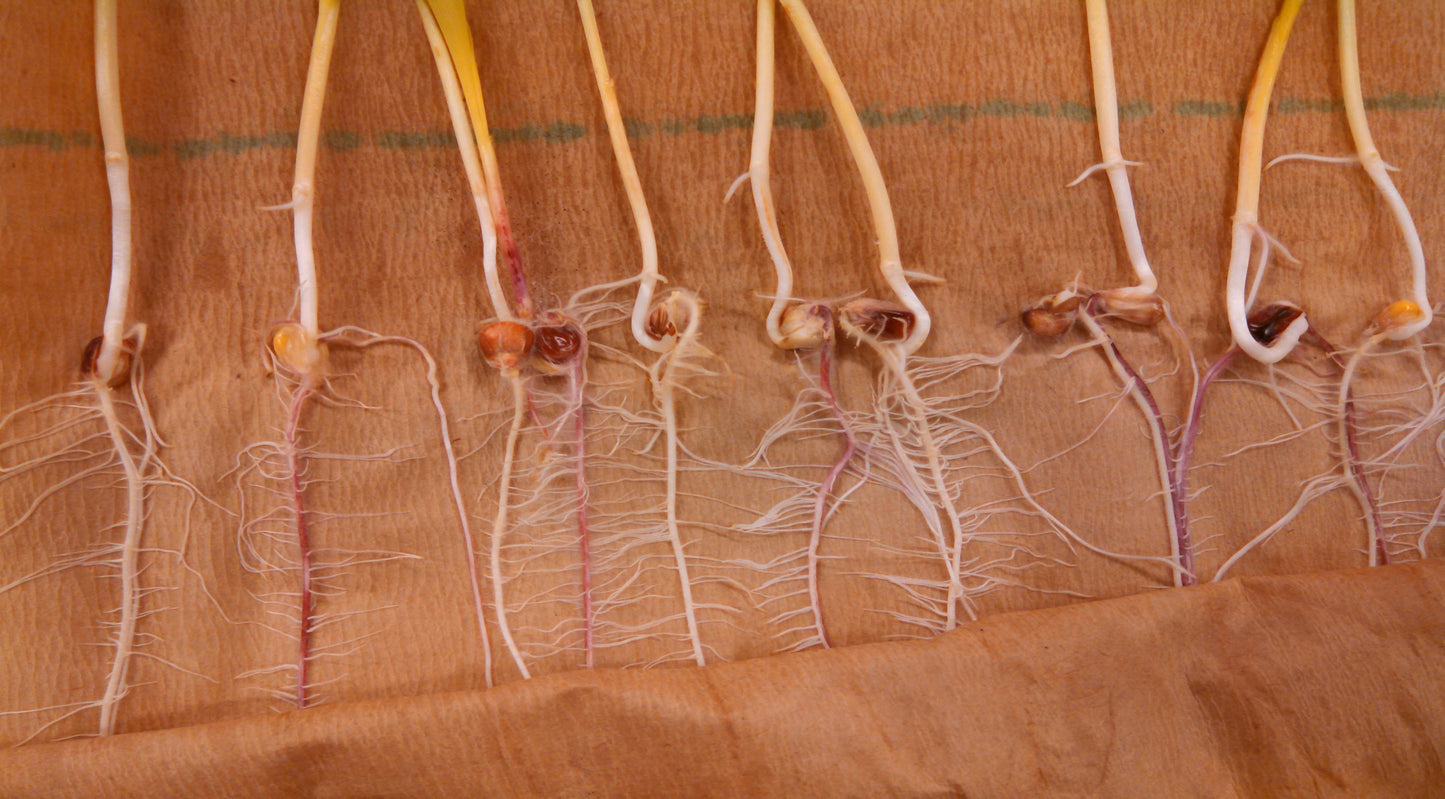
You can start checking your seeds 3 days after set-up and continue checking the seeds every couple of days until all have sprouted or look like there isn’t going to be any more germination activity. Most vegetable seeds will show signs of germination after 10 days but harder seeds may take longer. Spray occasionally to ensure seeds are kept moist. As they grow, they will absorb available moisture. Remove any moldy seeds so mold does not spread. Moldy seeds should be not counted as viable.
Calculation
To determine germination rate, divide the number of seeds sprouted by the number of total seeds used in the test and multiply it by 100. For example, if 10 seeds were used and 6 sprouted the calculations are as follows:
(6 sprouted seeds/10 total seeds) * 100 = 60% germination rate
The lower the germination rate, the sooner the seeds should be grown to ensure the variety is not lost. The germination rate can also help you determine how many to plant in the garden. For example, if your goal is to have 5 zucchini plants and the germination rate is 60% then it is necessary to plant 8-9 seeds But be aware that other conditions can impact seedling survival in the ground such as animal predation, compact soil, etc. The test will indicate how many seeds are likely to sprout, not survive.
For seed sellers, the industry standards vary by species, but are around 75-80% minimum germination.
If you have only a small amount of seed, it is better to carefully plant what you have directly.
After the Test
Now that you have a number of sprouts in hand, try planting them! While many seeds are stronger and more resistant to environmental changes when they are directly sown, the sprouts can be slowly introduced and transplanted into your garden as well! It is especially worth salvaging larger-seeded crops if your seed quantities are low or you can’t bring yourself to compost your test. The first thing you want to do is slowly peel the sprouts from the paper towel, making sure to leave the roots as intact as possible. Then, you will want to put the seedling in a small starter pot with moist soil. Next, it is time to “harden off” the seedling. “Hardening off” is a process that allows seedlings to become accustomed to strong sunlight, cooler nights and less-frequent watering during a 7-10 day period. On a mild day, start with 2-3 hours of sun in a sheltered location. Increase exposure to sunlight a few additional hours at a time and gradually reduce frequency of watering, but do not allow seedlings to wilt. Once the seeds have hardened off, the general rule of thumb is that when a seedling has three to four true leaves, it’s large enough to plant out in the garden.